My local supermarket's started keeping quail, and it felt like a good day to try something a little more gamey. Quail's an interesting meat, and is quite lean. It like chicken, but a lot softer in texture and with a slightly sweeter taste. It's especially popular around Ramzan, where its lathered in a thick ginger-onion marinade and deep fried whole. In this recipe, I've grilled the quail with sumac, rosemary and thyme and served it with a fruity couscous and a light vinaigrette. To help with the grilling, I had the quails halved and spread out, but you can get them spatchcocked/butterflied as well.
Ingredients
Quail
- 2 quails, halved and
- 1 tsp dried thyme
- 1 tsp sumac
- 1 tsp dried rosemary
- 2 tbsp olive oil
- 1 tsp salt
- 1 tsp pepper
Couscous
- 1/2 cup instant couscous
- 1/2 cup boiling water
- 1 tsp salt
- 3 walnuts, chopped
- 3 almonds, chopped
- 6 raisins, chopped
- 1 tbsp chopped mint
Vinaigrette
- 1/2 purple onion, finely diced
- 1 tbsp mint, chopped
- 1 tsp salt
- 1 tsp paprika
- 1 tbsp olive oil
- 1 tbsp sherry vinegar
- 1 tsp pepper
Method
- Mix the quail ingredients together to create a marinade, add it to the quail pieces, and leave aside to marinate for at least 2 hour, and preferably overnight.
- For the couscous, add dissolve the salt in the water, mix the other couscous ingredients together and add the salted boiling water. Cover and leave aside for 7-8 minutes.
- Mix the vinaigrette ingredients together and store in the fridge until use.
- Once ready to grill, heat a grill pan or a barbecue on medium, and baste the grooves with oil.
- Once heated, pour the marinade over the quail one last time, then place each piece on the grill.
- Cook on each side for 4 minutes, until the quail pieces are cooked through. Take off the grill and let it rest for 2-3 minutes.
- To assemble, make a bed of the couscous and place two halves of the quail on top. Pour the vinaigrette over and serve up.
A wonderful medley of flavours and textures, with such a simple preparation. Classic pesto may work your muscles, but now with the whizz of a blender, it can be whipped up in a matter of minutes. Pesto is best served fresh with either pasta, as a dip or topped over bread. It balances the peppery flavour of basil with the wonderful sweetness of nuts, has the sharp bite of aged cheese. In this recipe, I've used walnuts in place of pine nuts, and grana padano, and served it up with fresh fettuccine, the recipe of which can be found here. I made this fettuccine with just fine plain white flour, and without semolina, as I wanted a softer texture.

Ingredients
- 2 tbsp chopped walnuts/pine-nuts
- 3 tbsp olive oil
- 1 bunch (60g) fresh basil, chopped
- 4 cloves garlic, chopped
- 1 tsp salt
- 1 tsp pepper
- 3 tbsp grated grana padano
Method
- Pound the garlic and walnuts/pine-nuts, with the salt and pepper, in a pestle, to a smooth paste.
- Add the chopped basil and water to a food processor/blender, and blitz to a thick paste.
- Add the garlic-nut paste and run again, to mix it evenly through the paste.
- Add the oil and turn into an emulsion. If the paste is too thick, add a little water to get the desired thickness.
- Remove the mixture from the food processor and into a large mixing bowl. Add the cheese and stir it into the paste. Avoid using the a food processor or blender for this bit, as the grated cheese would lose its distinctive sharpness and texture.
- Check the salt, and serve with pasta, on top of pizzas or as a dip.
- If using with pasta, fry the pesto lightly in oil and add the pasta water to thin it out, before mixing with the pasta.
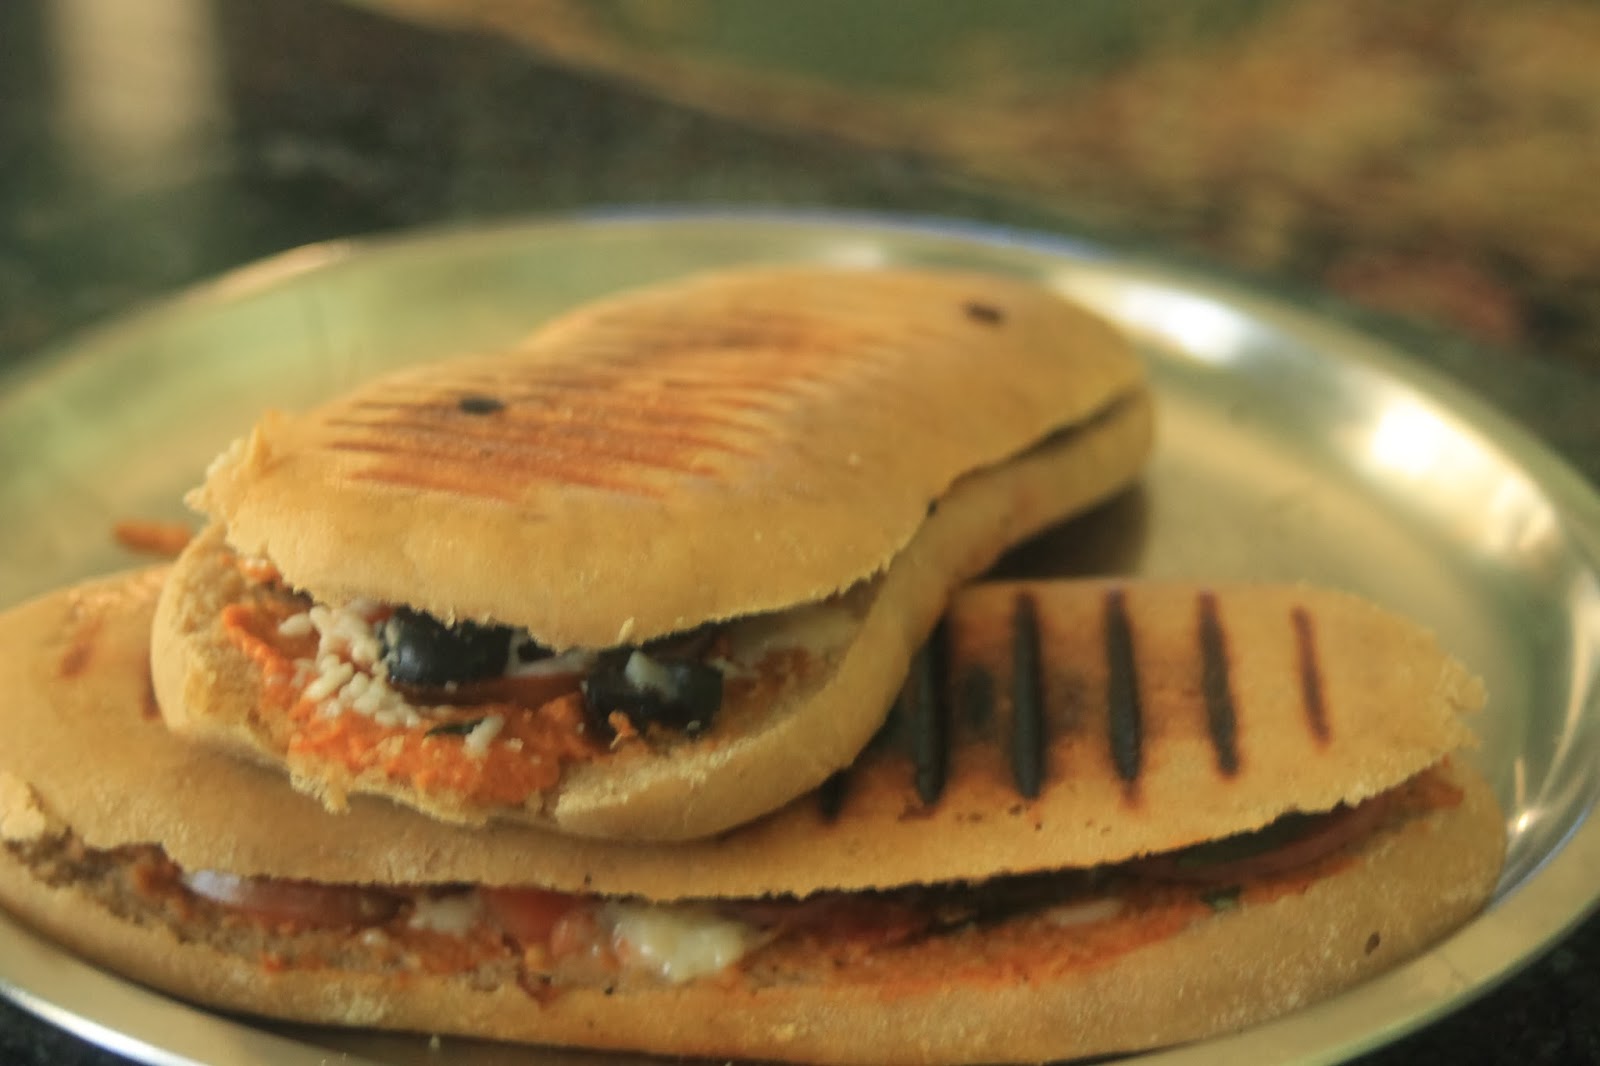
Have it for breakfast or lunch, its a satisfyingly filling sandwich, with a crisp top and an oozing centre. I made these as I had a little pepperoni and pizza sauce leftover, and a new grill pan to play with. A panini can be made in a panini press, or using a grill pan and a heavy weight. I made the bread, but the panini can be made with any other bread, like a foccacia, baguette or a sliced bread.
Ingredients
Bread
- 2 cups wholewheat flour
- 1 tsp dried yeast
- 1/2 cup warm water
- 2 tbsp oil
- 1 tsp salt
Filling
- 12 pepperoni slices
- 3 tbsp cheese (a mix of mozzarella and cheddar)
- 12-14 sliced olives
- 1 tomato, sliced
- handful of basil leaves
- 2 tbsp thick marinara or pizza sauce
Method
Bread
- Dissolve the yeast in warm water and leave aside to turn frothy.
- Once activated, add to the whole-wheat flour, oil and salt and made a smooth dough.
- Leave aside in a warm place to proof.
- Once doubled, punch down and shape into to long cylinders. Flatten each each cylinder slightly, transfer to a floured baking sheet and leave side in a warm place for a second proofing.
- Once the dough rises for a second time, place in a pre-heated oven, at 180C/gas mark 6 for 20 minutes.
Panini
- Heat a well-oiled grill pan on high heat and add the tomato slices. Grill on high heat on both sides.
- Slice the bread lengthwise and spread half the sauce on the lower half of the bread. Add half the pepperoni, grilled tomato slices, olives, basil and cheese.
- Place the top half of the bread back on, baste the top with olive oil and place on a well-oiled grill on medium heat. Place a heavy weight on top and grill it for around 5-7 minutes on both sides.
As I've said before, when you're making risotto, use the rice that you like to eat. I've used rose matta rice for this risotto, and while it doesn't have the same starch content as arborio, still makes a nice nutty and earthy risotto. Also, with risotto, be generous with the butter, you can run it off later, but to really make a delectable plate of risotto, you can't skimp on the butter. Lastly, to add a richness to the risotto, it needs a little cheese to just lift it up. Typically the cheese used is a mature parmesan or grana pandano, but both are quite sour and salty cheeses, and I'm not a fan of such mature cheeses. Thus, I've used processed cheddar instead as it adds that slight sweetness to the risotto.
Ingredients
- 1 cup rose matta rice, washed and cleaned
- 4 mushrooms, thinly sliced
- 1/2 cup dry white wine
- 1 tsp chili flakes
- 1 bay leaf
- 1 tsp dried oregano leaves
- 3 cloves garlic, thinly sliced
- 6-7 slices of black olives
- 3 tbsp butter
- 1 tbsp oil
- 3 cups vegetable stock
- 1 tsp salt
- 1 tsp pepper
- 1 tbsp granted processed cheese
Method
- Heat the stock and bayleaf till boiling, and then take off the heat.
- Heat 2 tbsp of butter and oil in a pan. Once foaming, add the garlic and fry till it starts to turn brown.
- Add the mushrooms and oregano. Cook on medium heat until the oil starts to separate.
- Add the rice and stir around till the oil coats each grain.
- Cook for a minute, until the rice turns a little opaque.
- Add the olives and wine and stir around vigourously to evenly distribute the wine. Cook covered until the wine is absorbed.
- Reduce the heat to low, and add a ladle full of the warm stock and the bayleaf. Stir around and cook covered until the stock is absorbed.
- Continue adding a single ladle-full and cooking until absorbed, until one ladleful remains.
- Add the last ladle of stock, salt, pepper, remaining butter and cheese. Stir vigorously and cover. Cook until the cheese has melted into the sauce, and a thin sauce remains.
- Check the rice, it should be chewy in the centre.
- Remove from the heat and let it stand, covered, for 5-10 minutes. Then remove the bay-leaf and serve up immediately.
Fresh buckwheat noodles with a spicy sauce and picked radish, this cold salad has an interest mix of flavours and textures, from the bitterness of the buckwheat to the tartness of the pickled radish. This cold salad is a korean creation and is meant to be had in summer, and packs a mean punch in terms of heat. I came across this recipe at beyondkimchee.com, and changed it around slightly to fit the ingredients at home. The recipe for the buckwheat noodles is from thekitchn.com, which is a great site with helpful instructions for making pasta and noodles.
Ingredients
Buckwheat Noodles
- 2 cups buckwheat flour (called 'Kuttu atta' in India)
- 1/2 cup plain white flour
- water to make a dough
- 1 tsp salt
Pickled Radish
- 1 radish, peeled and cut into thin and broad slices
- 1 tsp salt
- 2 tbsp white vinegar
- 1 tbsp sugar
Sauce
- 1/4 cup soy sauce
- 1/2 cup water
- 1/2 apple, peeled and roughly diced
- 2 ripe star fruit or 4 thick slices of pineapple, roughly diced
- 8-10 dried red chilies, de-seeded and chopped
- 1 small onion, finely chopped
- 2 cloves garlic, roughly chopped
- 4 tbsp white vinegar
- 3 tbsp crushed jaggery or brown sugar
- 2 tbsp honey
- 1 tbsp sesame oil
- 1 tsp ginger powder
- 1 tbsp mustard
- 1 tsp salt
- 2 tbsp toasted sesame seeds
Garish
- 1 cucumber, deseeded and cut into thick semi-circular slices
Method
Buckwheat Noodles
- Make a smooth dough with the buckwheat flour, plain flour and salt. Roll it out on a pasta maker or with a rolling pin into thin sheets.
- Cut into noodles and boil in salted water for a few seconds, until cooked. I cut them out into flat noodles as they were easier to handle.
- Once cooked take out of the boiling water and rinse in cold water. Then store in the fridge until its time to assemble the salad.
Pickled Radish
- Dissolve the salt and sugar in the vinegar and pour onto the radish slices.
- Toss around and leave aside in the fridge for at least 1 hour.
Sauce
- Heat the water and soy together until it starts to boil. Then take it off the heat and leave aside to cool.
- Combine the apple, onion, star fruit, garlic and chopped chili in a food processor, add 2 tbsp of water and blend together to create a thick paste.
- Add the paste to the soy-water mixture, and toss in the vinegar, jagger, honey, mustard, ginger powder, salt and sesame oil, mix together and return it to the heat.
- Boil on high heat until the sauce develops this silky sheen. Add the sesame seeds and take it off the heat. Mix the sesame seeds through the sauce, and place in the fridge to cool.
Salad
- Once all the components are cold, toss the noodles in a plate and pour on some of the sauce. Add some pickled radish and cucumber slices as a garnish.
- To keep it cold, keep a plate in the freezer for 10 minutes, and use this for assembling and serving the salad.
Gnocchi's one of those little fuzzy things that you just can't get enough of. The name is too just so cute that you don't want to stop saying it. Light and fluffy pillow cases that just melt away when you bite into them and they pair perfectly with a lightly flavoured mushroom sauce. The Gnocchi need a bit of muscle in the prep, and so it makes sense to start a little early.
Ingredients
Gnocchi
- 4 potatoes, whole
- 1 cup flour
- 1 egg
- salt to taste
- salted water to boil
Mushroom sauce
- 4-5 button mushroom, thinly sliced
- 1/2 cup dry white wine
- 3 cloves garlic, thinly chopped
- 1 tsp chili flakes
- 1 tbsp olive oil
- 1 tsp oregano
- 1 tsp pepper
Method
Gnocchi
- Boil the potatoes in salted water, until cooked through. To test the potatoes, run a knife till the centre; if the knife passes through easily, the potato is cooked, but it it encounters any resistance, keep boiling.
- Once boiled, run the potatoes under cold water and peel the skin off.
- Mash the potatoes until smooth, and add the egg. Mix around and add half the flour.
- Oil your fingers and knead the mix. Keep adding incremental amounts of flour till you get a sticky dough that keeps its form.
- Roll out the dough into a thick sausage shape and cut out sections around an inch across.
- Heat some salted water and once boiling, add the sections. Boil until they rise up to the surface and remove.
Sauce
- Heat the oil in a pan and add the garlic. Cook until it starts to brown.
- Add the mushroom, chili flakes, pepper and oregano, and cook until the oil starts to separate.
- Add the wine and cook on a high flame for a minute.
- Add a little of the gnoochi cooking liqour to make a sauce.
- Let it stew on low heat until it melds together; the starch in the cooking liqour should thicken to create a thick sauce. You can add a little water to thin it down.
- Check the salt, and add salt if necessary.
- Toss the gnocchi into the sauce, and lightly stir around.
- Serve up hot with some bread to mop up the sauce.
A thick sweet soup, with a lovely silky feel and the bite of celery. This is a simple soup is quick and requires just a handful of ingredients. It also requires very little cooking, and is a great choice for lunch or dinner on lazy days. Also remember to use fresh celery and parsley, as they are the dominant flavours in the soup, and slightly old and wilted celery and parsley have a slightly bitter undertone, that makes the soup unappetizing.
Ingredients
- 4 carrots, peeled and roughly chopped
- 2 stalks celery, roughly chopped
- a small bunch of curly parsley, chopped
- 3 cups vegetable stock
- 1 bayleaf
- 3 cloves garlic, finely chopped
- 1 tbsp olive oil
- salt and pepper to taste
Method
- Heat the olive oil in a deep bottomed pan and add the garlic.
- Fry the garlic until its just cooked, but don't brown it.
- Add the carrots and celery and lower the heat. Sweat out the carrots until they soften.
- Add the stock, 3/4ths of the parsley and bayleaf, and cook covered, on low heat, until the carrots are completely cooked through.
- Add the salt and pepper and mix around, then take off the heat, and let it cool.
- Once cool enough to blend, remove the bayleaf and add a ladle full to a food processor.
- Blitz until smooth, and keep adding ladles and blending until you get a smooth and thick soup.
- Garnish with the remaining parsley and serve up.