Saturday, August 31, 2013

Paella de Marisco


Paella, in all its forms and variants, is the perfect dish to cap a lazy weekend. Its a non-fussy dish that practically cooks itself and is a great way of finishing up leftover vegetables and meats. As a student I'd make a large batch of it at lunch on Sunday, then store and have it during the week. The rice typically used for paella is either calasparra or bomba, but any medium grain low starch rice can be used; I've used rose matta rice as it expands into these chewy and almost round rice grains that are textually differentiable from peas, prawns and squid. The only absolute necessities in a paella are chorizo (or any sausage cured with paprika) and paprika, and you can play around with all the other ingredients to find your own balance. I didn't have any chorizo around, so I used Hungarian sausage instead and upped the chili flakes.


Ingredients

  • 5-6 thin slices of chorizo, roughly chopped
  • 1 onion, chopped
  • 2 red peppers with one finely diced
  • 2 tomatoes, roughly chopped
  • 4 cloves of garlic, chopped
  • 2 cups medium grain rice (like rose matta or calasparra)
  • 6-7 strands of saffron
  • 1 tsp chili flakes
  • 1 tsp paprika
  • 2 tsp dried thyme
  • 1/2 cup peas
  • 4 cups chicken/fish stock
  • 1 cup dry white wine
  • 8-9 prawns, cleaned and deveined
  • 19-20 cooked clams
  • 6 squids, cleaned and cut into thick rings
  • 2 tbsp olive oil
  • salt to taste
  • Chopped parsley and lime to serve
Method
  1. Heat the stock on medium heat till it starts to boil. Switch it off and add the saffron. Mix it around so that the golden hue of the saffron diffuses through the stock. The saffron is only present in the recipe to add that light golden colour to the rice grains. It can easily replaced with 1 tsp turmeric for a punchier yellow.
  2. Roast the un-diced red pepper, either in an oven or over the stove. Once the skin blackens in parts on each side, take off and let it cool. Then peel the skin off and cut into longitudinal strips.
  3. Heat the oil in a flat-bottomed pan with a lid. Once smoking, add the chorizo and fry to a crisp.
  4. Add the garlic, onions and diced red pepper and fry it in the oil. Once the onions become translucent, add the tomatoes, thyme, peas, paprika and chili flakes and stir around. Cook on a high heat until the tomatoes lose their firmness and then add the rice.
  5. Stir the rice around to make sure that the oil coats each individual grain.
  6. Add the wine and cook the rice until the wine is completely absorbed.
  7. Then pour in half the stock, reduce the heat to medium high and cover with a lid. Once the stock's been poured in, avoid stirring the rice.
  8. It should take around 10-15 minutes for the stock to be absorbed by the rice. Once absorbed, add the prawns and the remaining stock. 
  9. Cook on a medium high heat and put the lid back on. Once most of the stock is absorbed, and only a thin film of it is left, add the squid rings and clams, and salt to taste.
  10. Put the lid back on and let it cook until the stock is completely absorbed.
  11. Take off the heat and let it rest for 5 minutes, covered. Garnish with parsley and the juice of the lime and serve up.

Sunday, August 25, 2013

Prawn and Pea Risotto


Risotto is all about the rice. Its light seasonings and slow cooking pace are designed to pull as much flavour from the rice as is possible. So don't be snooty about the rice that you use, there's no absolute need to use arborio rice for it. Use any short grained rice that you like for your risotto. I'm not a fan of starchy arborio, and prefer the earthy taste of rose matta. Its not as starchy, and the risotto won't be as creamy, but it adds a nice sweetness to the risotto. You make it a little rich and creamy by finishing the risotto with some butter and a cup of cheese, but I left that out as I can see myself putting in any extra time in the gym for it.

I've made this risotto with prawn and chicken stock, but you can make a vegetarian version with mushroom and vegetable stock, and just keep the peas. I've also added some paprika for heat. For cooking the risotto, use a deep thick bottomed pan with a lid. 

Ingredients
  • 1 cup rose matta rice (or any short-grained rice)
  • 1/2 cup peas
  • 5-6 uncooked prawns, shelled and deveined
  • 1 small onion, chopped
  • 5 cloves garlic, chopped
  • 1 tsp paprika
  • 1 bay leaf
  • 1/2 cup white wine
  • 2 1/2 cup chicken stock
  • 1 tbsp butter
  • salt and pepper to taste
Method
  1. Heat the chicken stock until it starts to boil, and then take it off the heat and set aside covered. This is to keep the stock warm as you ladle it into the risotto.
  2. Melt the butter in the pan and add the onions, garlic, bay-leaf and paprika. Fry on high heat till the onions turn translucent.
  3. Add the rice and stir around to make sure that the butter coats each grain.
  4. Cook on a high heat and keep stirring the rice to prevent it from sticking. Cook until the rice turns opaque.
  5. Add the wine and stir it around to deglaze the pan. Then reduce the heat to a medium high, and cover the pan. Let it sit on the heat until the rice absorbs the wine.
  6. Add the peas and about 1/2 a cup of the chicken stock. Stir once, then cover and let is sit on the heat until the rice absorbs the liquid.
  7. Add another 1/2 cup and stir once, then leave to cook covered. Keep repeating this and test the rice after around 10 minutes to see if its close to cooking.
  8. Once you estimate that the rice is nearly cooked, add the prawns and one last cup of stock. Stir once and cook covered until the rice is just done and there is a little creamy liquid left in the pan. The prawns too should be bright red and glistening. The risotto is cooked when the rice is tender, but is just a little tough in the centre.
  9. Take off the heat, and let it cool for 5 minutes. This resting gives the starch released by the rice some time to meld into the creamy sauce.
  10. Serve up immediately. Try to finish the risotto right after cooking as it doesn't store well. Reheated risotto has this clammy feel and porridgy texture.

Saturday, August 24, 2013

Fresh Fettuccine with a Zucchini Marinara sauce


Fresh pasta has this tenderness and and unctuousness that store bought pasta can scarcely compare with. I bought a pasta machine last week and had to try it out this weekend. Fresh pasta needs a lot of "love", ergo a lot of pounding and stretching, to make as it uses hard summer wheat but needs the glutinous flexibility of winter wheat. So be prepared to exercise those dormant muscles in your hands and arms as they're in for quite a workout while making the dough. 

For the sauce, I used a simple marinara, with the addition of some zucchini and bacon for that little textual lift. For a vegetarian version you can omit the bacon entirely, and add some crisp onion as a garnish at the end for a little crispiness.

Ingredients

Fettuccine

  • 4 cups fine wheat semolina, or hard wheat flour
  • 5 eggs
  • 1 tsp salt
  • Extra plain flour for dusting
  • Vegetable oil for oiling
Marinara Sauce
  • 6 whole tomatoes
  • 1 medium onion, chopped
  • 5 cloves of garlic, chopped
  • 1 tsp dried oregano
  • 1 tsp dried thyme
  • 1 tsp dried basil
  • 1 tsp paprika
  • 1/2 cup white wine
  • 1 tbsp olive oil
  • 1 tsp pepper
  • salt to taste
  • 1/2 a zucchini, chopped into thick quarters
  • 3 rashers of back bacon, roughly chopped
Method

Fettuccine
  1. Mix the eggs, salt and semolina together and knead into a firm dough. You shouldn't need any extra water, but in case the dough is a little loose add a little plain flour to kelp bind it together
  2. Once the dough is made, place it on a floured workplace and oil your fingers. Then punch the dough down and stretch it out with the base of your palms. Roll it back and stretch it out again. Working this way with the dough will get the wheat germ to release its gluten.
  3. Keep working on the dough until its springy to touch; which should take around 10 minutes of kneading. Then wrap in cling-film and let it rest for at least 30 minutes.
  4. Once rested split into 8 sections, and take one while keeping the rest under cling film to prevent it from drying out.
  5. I used a pasta-machine, so roll it out until the pasta sheet is around 1 mm in thickness (setting 7). Then cut it out into fettuccine strips and boil in salted water. Keep the dough and fettuccine strips lightly floured to keep it from sticking. 
  6. The fettuccine when cut would appear to be bunched together, but they would separate out when boiling. Just lightly shake it just as you add it to the boiling water and it will separate out.
  7. Cook until its just cooked and just firm to touch, which should take around 2-3 minutes. Drain and lightly oil.
  8. Repeat with the remaining pieces of dough.
Marinara sauce
  1. Score the top of the tomatoes crosswise and boil until completely cooked. Remove and keep under cold water, then peel the skin off the tomatoes.
  2. Add the boiled and skinned tomatoes to a food processor along with the oregano, thyme and paprika. Grind until you get the desired texture, such as keeping it chunky or smoothening it out.
  3. Heat the olive oil in a pan and add the chopped garlic and onions.
  4. Fry until the onions turn translucent and add the zucchini. Fry and cook the zucchini and add the white wine.
  5. Stew on a high flame and add the ground tomato.
  6. Add the pepper, basil and some salt to taste and bring the sauce to a boil. Then lower the flame to medium and let it stew. I like my marinara sauce to be thick and thus I cook the sauce uncovered. If your cooking it uncovered, keep stirring it periodically to prevent it from burning. Once cooked remove from heat and keep covered.
  7. Fry the chopped bacon on high heat and in its own fat. Add the crisp bacon to the sauce and mix in in.
  8. Create a base of fettuccine and ladle the sauce over. Serve up and dig in.


Sunday, August 11, 2013

Fuzi with a bacon and garlic sauce


Fresh pasta just has a different feel and tenderness. And with the freedom to shape it as you wish, it adds a textual lift to any pasta dish. I haven't tried shaping pasta before, so the fuzi that I've made here are a little misshapen, but they make for a lovely lunch, especially with a simple bacon garlic sauce. I remember seeing these made in Anthony's Bourdain's fishy feast around Istria, and when dressed with white truffles and cream, they looked delectable. Fresh pasta is typically served up with a thick sugo of chicken and game meats, but I'm not a big fan of heavy meaty sauces for lunch.

I've used smoked bacon in this dish, but it can just as easily be substituted with mushrooms. Also, I rolled and cut these out by hand, and thus they've ended up in a little  varied in size. 


Ingredients

Pasta
  • 1 cup whole wheat
  • 1 cup semolina or hard wheat flour
  • 2 eggs
  • Water
Sauce
  • 2 rashers of bacon, chopped
  • 1/2 cup milk
  • 1/2 tsp paprika
  • 2 cloves garlic, chopped
  • 1/2 tbsp olive oil
Method

Pasta
  1. Mix the eggs, wheat and semolina together and add a little water to make a soft dough. Leave aside to rest for 30 minutes.
  2. Roll out the dough into a thin sheet and cut out 1-1.5 inch squares.
  3. Take one pair of opposing corners of a square and pinch it together, leaving a . An alternate folding style is to cut the square along the diagonal to create two triangle, and pinch the three edges together at the top to create a little cap. 
  4. Boil the pasta in salted water till its just cooked. Add a little vegetable oil and rub it into the pasta to keep it from sticking.
Sauce
  1. Heat the oil in a pan, and add the bacon. Crispen the bacon and add the garlic. 
  2. Keep stirring to prevent the garlic from burning. Cook until the garlic releases its aromatic oil, and add the milk.
  3. Reduce the heat, add the paprika and salt to taste. Let the sauce stew for 2-3 minutes to let the flavours meld together.
  4. Add the pasta, and toss around. Serve up hot and right off the stove.


Saturday, August 10, 2013

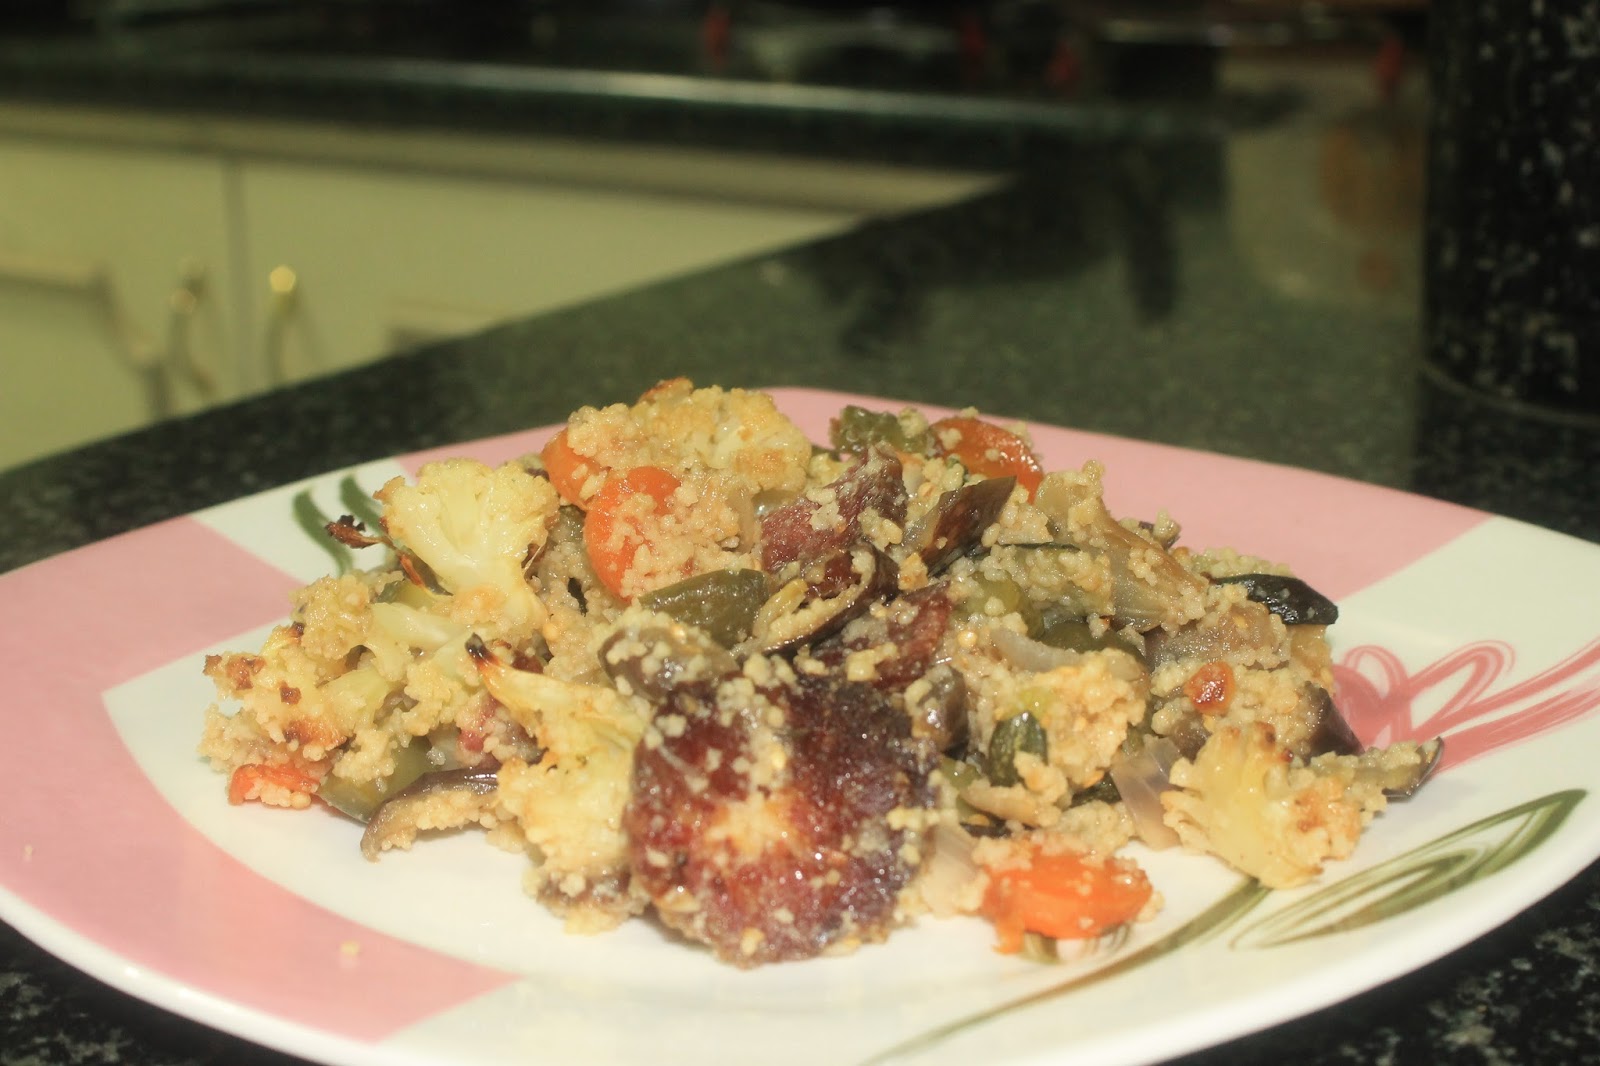
Roasted Vegetables with Couscous


Couscous is such a wonderful ingredient; its light and airy.  It also makes for an excellent palette for the melding of flavors and binds the many parts of the dish together. I've made this salad with roasted vegetables, as roasting given them that extra bit of punch, and I love a bit of charing around the edges. This salad is simple enough and requires little attention, as its just a matter of prepping the vegetables and leaving them to roast in the oven. I've also added some Hungarian smoked sausage, as it adds a different texture and some smokiness, but you can use any bacon or chorizo as a substitute, or omit it altogether for a vegetarian version.

Ingredients
  • 4-5 thin slices of smoked Hungarian sausage, quartered
  • 1/2 red onion, roughly chopped
  • 1 carrot, roughly chopped
  • 1 aubergine, cut into thick cubes
  • 1/2 zucchini, cut into thick match-sticks
  • 2-3 florets of cauliflower, split along the stem
  • 3 pickled gerkins, roughly chopped
  • 1/2 cup uncooked couscous
  • 1 cup low sodium chicken stock
  • 1 tsp dry rosemary
  • 1 tbsp olive oil
  • juice of 1/2 a lemon
  • salt and pepper to taste
Method
  1. Pre-heat the oven to 200C/gas mark 6.
  2. Add the sausage, onion, carrot, aubergine and cauliflower in a roasting pan. Add the oil and rosemary and toss around to get the oil to evenly coat the vegetables. Sprinkle on some salt and pepper. Add a little extra salt as it'll make the vegetables a little bit crisper and will be balanced out by the couscous.
  3. Place the roasting tin in the oven and leave it in there for 40 minutes. Turn once at 20 minutes, but otherwise leave it alone.
  4. Heat the chicken stock till it starts boiling. Add the boiling stock to the couscous, cover and leave aside.
  5. Once the couscous has cooked, add the gerkins.
  6. Once the roastings done, remove from the oven, add the couscous to the mix and toss the mixture around.
  7. Leave it covered for a minute, as it will allow the couscous to absorb the roasting juices.
  8. Plate up, add a splash of the lemon juice and serve up. 


Saturday, July 27, 2013

Awadhi Ghost Biryani


Wonderfully fragrant and lightly spiced, I love awadhi biryani and have been looking to make it for quite some time. This style of biryani has its origins in the kitchens of Lucknow, the erstwhile capital of the kingdom of Awadh, and is distinguishable form other styles by the melding and light use of spices and heavy use of aromatics like Kewra extract and rose water. I've also added mint as I love its wonderful fragrance when baked. 

The fragrance of the biryani is also enhanced by its cooking style, where it is cooked on a low flame in a sealed container to seal in the flavour and aroma of the ingredients.

A word of warning, the preparatory time for this biryani is upwards of 2 hours, as it has a number of components that need to be separately prepared and assembled together just before the last round of cooking.  

I used mutton for this biryani, as its the preferred meat in awadhi cooking, but this can just as easily be made with chicken, with suitable variation in the cooking time, or with boiled eggs or vegetables, with the use of stock cubes for the savoury broth.


Ingredients

Meat Marinade and Gravy
  • 500 g mutton, with bones and cut into bite sized chunks
  • 2 medium onions, one finely chopped and other cut into thin longitudinal slices
  • 3 cloves garlic, chopped
  • 1" ginger, chopped
  • 3 cloves
  • 5 peppercorns
  • 1" cinnamon
  • 1 tsp coriander powder
  • 1 tsp cumin
  • 1 tsp turmeric powder
  • 2 dry red chilies, chopped
  • salt to taste
  • 1/2 cup plain yogurt
Rice and Savory broth

  • 2 cups basmati rice, washed
  • 5 cloves
  • 1 star anise
  • 1" cinnamon
  • 2 bayleaves
  • 8 peppercorns, cracked
  • 3 black cardamoms, slit
  • 1 small piece of nutmeg
  • 2" ginger, sliced
  • 2 tbsp ghee (clarified butter)
  • salt to taste
Garnish
  • 1 medium onion, thinly sliced longitudinally
  • 4-5 cashew nuts, roughly chopped
  • 4-5 almonds, roughly chopped
  • 1/4 cup fresh mint leaves, roughly chopped
  • 1 tbsp ghee (clarified butter)
Aromatic milk
  • 1/2 cup milk
  • 3 green cardamoms
  • 3-4 strands of saffron
  • 1/2 tsp kewra extract
  • 1/2 tsp rose water
Method

Mutton Marinade

  1. Crush the dry spices in a mortar and add it to the chopped onion, garlic and ginger. Add the yogurt and make a thick marinade. Add around a 1 tsp of salt.
  2. Add the mutton pieces to the marinade, and toss around to make sure that it evenly coats the mutton.
  3. Leave in the fridge overnight, or for at least 6 hours.
Savoury Broth
  1. Place all the spices in the middle of a cheesecloth and tie its ends together to create a spice pouch.
  2. Take the mutton pieces out of the marinade and keep the marinade aside.
  3. Heat 1 tbsp of ghee in a pressure cooker and add the mutton pieces. Brown the pieces on all sides and add 3.5 cups of water. In case you don't have a pressure cooker, use a heavy bottomed pan and cook with a lid. Also add an extra half cup to a cup of water, to ensure that you have 3.5 cups of the savoury broth after cooking the mutton.
  4. Add the spice pouch and close the pressure cooker. Cook for 8-10 minutes until the mutton is tender and falling apart.
  5. Separate the mutton pieces and the savoury broth using a sieve. Remove the spice pouch. The spice pouch can be thrown away, or dried out and used for spicing soups.
Mutton Gravy
  1. Heat a tbsp of ghee in a heavy bottomed pan and add the sliced onions and brown on high heat. 
  2. Add the marinade and cook until the oil starts to separate.
  3. Add the mutton pieces and 1/2 cup of the savoury broth. Toss around lightly to create a thin gravy.
Aromatic Milk
  1. Crush the cardamom pods lightly. 
  2. Heat the milk and add the crushed cardamom.
  3. Bring to a boil and remove from the heat.
  4. Crush the saffron and add it to the milk. Stir it into the milk, cover and leave aside to cool.
  5. Stir periodically to prevent the cream from separating.
  6. Once cool, add the kewra extract and rose milk and keep covered.
Garnish
  1. Dry roast the chopped almond and cashew, till the pieces are lightly tinged with brown specks.
  2. Heat a tbsp of ghee in a heavy bottomed pan and add the onions. Brown the onions on high heat, and leave aside to cool.
  3. Once the onion has cooled, add the roasted almonds and cashews and the chopped mint.
  4. Toss around to evenly distribute the ingredients.
Rice
  1. Heat 1 tbsp of ghee in a pan with a lid. Add the washed rice and stir around until the rice glistens.
  2. Cook on high heat till the rice turns opaque.
  3. Add the savoury stock, reduce the heat and cook covered for 10 minute, or until the rice absorbs the stock.
  4. Take off the heat and keep aside, covered, for ten minutes.
Assembling the Biryani
  1. Take an oven proof bowl with a tight fitting lid.
  2. Pre-heat the oven at 220 C/gas mark 7.5
  3. Add half the rice to the bowl and flatten it out. 
  4. Pour half the aromatic milk over, in a circular pattern.
  5. Add the mutton gravy and spread it to create a mutton layer.
  6. Add the half the garnish and spread it out.
  7. Cover with the remaining rice and flatten out.
  8. Pour in the remaining aromatic milk in a circular pattern, and spread the remaining garnish. Close the bowl and place in the pre-heated oven, at 220 C/gas mark 7.5
  9. Let it cook at 220 C for 10 minutes and then lower the heat to 120 C/gas mark 4 for 15 minutes.
  10. Once done, take it out of the oven and let it rest for 10 minutes.
  11. Carefully remove the lid and let those wonderful aromatics tease your senses. Serve   up with a raita of yogurt and cucumber and onions.


Sunday, July 21, 2013

Jenji Gaasi


Sweet crab and a spicy coconut gravy; it shouldn't work, the spices should overpower the delicate flavour of the crab...bah that rubbish, this is wonderful and easy way of cooking crab, with the coconut base balancing out the sweetness and the spice to create this wonderful chemistry of flavour. This is a Manglorean dish and is best had with plain streamed rice. I love crab, especially cutting into it and extricating that wonderful meat. I also prefer to cook it with the shell, as it protects the meat from the heat through the slow cooking process. The dish takes around 40 minutes of preparation and 20 minutes of cooking.

Ingredients
  • 250 g blue crab, cleaned and cut into large chunks
  • 1 medium onion, finely chopped
  • 1 inch ginger, roughly chopped
  • 2 cloves garlic, roughly chopped
  • 1 medium tomato, chopped into large chunks
  • 2 red chilies, reconstituted in hot water
  • 1 thumb sized piece of tamarind
  • 1 tsp fenugreek seeds
  • 1 1/2 tsp coriander seeds
  • 1 tsp cumin seeds
  • 6 peppercorns
  • 1 star anise
  • 1/2 cup shredded coconut
  • 1/2 tsp turmeric powder
  • salt to taste
  • 1 tbsp vegetable oil
  • 1/2 cup water
Method
  1. Wash the crab, and sprinkle with salt and turmeric. Be restrained with the salt, as the crab will naturally be a little salty. Rub the turmeric and salt into the crab chunks.
  2. Dry roast the peppercorns, coriander sees, star anise and cumin together, until they release their aroma. Keep stirring it around to prevent the cumin from burning.
  3. Add the roasted spices to the ginger, garlic, fenugreek seeds, red chilies, coconut and tamarind, add a little water and grind into a thick and smooth paste.
  4. Heat the oil in a pan, and add the onions. Fry until translucent.
  5. Add the tomatoes and fry till it softens.
  6. Add the ground paste and stir around. Cook the paste until the oil starts to separate.
  7. Add the crab pieces and toss around so that the paste covers the crab. Add the water and salt to taste and cook covered for 8-10 minutes, till the crab cooks through.
  8. Once done, take off the heat and let it rest for a few minutes.
  9. Serve up over a base of plain rice.